Prosthetic fabrication is a highly specialized and intricate process that combines advanced technology, artistry, and a deep understanding of biomechanics. Whether you are new to prosthetics or seeking to upgrade your existing prosthesis, understanding the stages of prosthetic fabrication can provide clarity and confidence. At Grace Prosthetic Fabrication, we are committed to ensuring that every prosthesis we create is tailored to fit the unique needs of each patient, providing them with the comfort, function, and support they deserve.
In this blog, we’ll take you through the process of prosthetic fabrication—from the initial consultation to the final delivery and fitting.
1. Initial Consultation and Assessment for Prosthetic Rehabilitation
The first step in the prosthetic fabrication process is the initial consultation. This is where you’ll meet with a prosthetist to discuss your specific needs, goals, and any previous prosthetic experiences.
Key Aspects of the Prosthetic Rehabilitation Consultation:
- Medical History and Evaluation: The prosthetist will review your medical history, the type of amputation (whether it’s a below-the-knee, above-the-knee, below-the-elbow, etc.), and any physical limitations or challenges you may face.
- Functional Goals: Understanding your lifestyle and functional goals is crucial. Whether you want to walk, run, or perform specific tasks, your prosthesis will be designed to meet those needs.
- Measurements and Impressions: The prosthetist will take precise measurements of your residual limb. In some cases, a cast or 3D scan will be made to capture the exact shape and size of the limb to ensure a perfect fit.
Tip: Be prepared to discuss how you plan to use your prosthesis in daily life. This helps your prosthetist make the best recommendations for design and functionality.
2. Prosthetic Fabrication: Design and Materials Selection
After the assessment, the next step is designing the prosthesis based on your individual needs and preferences. This phase involves close collaboration between the prosthetist and the patient.
Key Considerations in the Design Process:
- Type of Prosthesis: Whether you need a functional leg, arm, or specialized prosthesis (such as a prosthesis for sports or prosthetics for children), the design will reflect your lifestyle requirements.
- Material Selection: Different materials are used for different parts of the prosthesis. For example:
- Socket Material: The socket (the part that fits around the residual limb) is typically made from lightweight, durable materials such as carbon fiber, thermoplastics, or fiberglass.
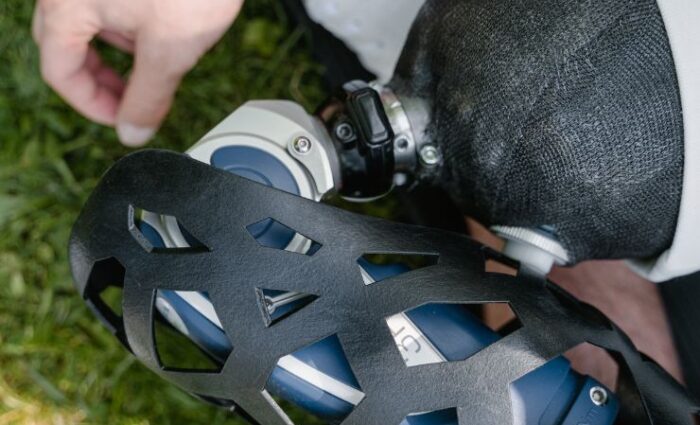
- Pylon and Components: The pylon is the structural framework of the prosthesis, often made from titanium or aluminum for strength and lightness.
- Cosmetic Covers: Some patients choose to add a cosmetic cover to the prosthesis, which can be customized to look like natural skin or other textures.
The materials selected are chosen for their ability to balance durability, comfort, and functionality.
Tip: If you have specific aesthetic preferences or wish to customize the appearance of your prosthesis, this is the time to discuss it with your prosthetist. Many cosmetic options allow for personalization.
3. Prosthetic Fabrication: Creating the Prosthesis
Once the design and materials are selected, the prosthetic fabrication process begins. This is where the magic happens as the prosthesis is carefully constructed to match the measurements, materials, and functional requirements discussed in the earlier stages.
Fabrication Process:
- Molding and Shaping: The first step in fabrication is creating a precise mold or cast of the residual limb, which serves as the foundation for the socket. In advanced prosthetic fabrication, a digital scan may be used to create a 3D model of the limb, enhancing accuracy.
- Socket Creation: Using the mold or scan, the prosthetist creates a custom socket designed to fit comfortably and securely around your residual limb. The socket is then shaped and refined to ensure a perfect fit.
- Assembly: After the socket is prepared, the other parts of the prosthesis, such as the pylon, foot or hand components, and joints, are assembled. The prosthetist carefully ensures that each part fits together seamlessly and functions correctly.
- Alignment and Testing: The prosthetist will test the alignment of the components to ensure that the prosthesis will allow you to move and perform tasks comfortably. Adjustments may be made to ensure balance, comfort, and functionality.
Tip: During this phase, it’s common to have follow-up visits to ensure the alignment and comfort of the prosthesis. This stage may involve fine-tuning the prosthesis to ensure it meets your needs.
4. Fitting and Adjustment
Once the prosthesis is fabricated, the next step is the fitting appointment. This is where you will try on the prosthesis for the first time, and the prosthetist will make adjustments to ensure comfort and functionality.
Key Aspects of the Fitting Process:
- Initial Fitting: The prosthetist will fit the prosthesis on your residual limb, adjusting the socket and other components to ensure a snug and comfortable fit.
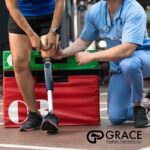
- Walking and Movement Testing: You’ll be asked to walk, stand, or perform other movements to ensure the prosthesis supports your movement and allows for the desired level of activity.
- Fine-Tuning: Small adjustments are made to the prosthesis during the fitting to ensure that it aligns properly and feels comfortable. This may include adjusting the height, alignment, or the fit of the socket.
Tip: Don’t hesitate to speak up if the prosthesis feels uncomfortable or if there’s any rubbing, pinching, or pressure. The fitting process is about making sure that you feel comfortable and confident.
5. Delivery and Follow-Up Care of Prosthetic Fabrication
Once the final adjustments are made and you are satisfied with the fit and function, the prosthesis is ready for delivery. However, the process doesn’t end there—ongoing care and follow-up appointments are essential to ensure the prosthesis continues to perform well as your body changes over time.
Ongoing Care:
- Regular Check-ups: Follow-up appointments are important to ensure the prosthesis remains in good condition and fits well. Adjustments may be necessary as your residual limb changes or as you become more accustomed to wearing the prosthesis.
- Maintenance and Repairs: Prostheses can wear out over time, so regular maintenance is necessary. This includes checking for any damage, wear and tear, or changes that may affect the fit or function.
- Upgrades and Modifications: If your needs change or you want to improve the functionality of your prosthesis, the prosthetist can help you with upgrades or modifications, such as adding more advanced components or cosmetic features.
Tip: Stay in touch with your prosthetist to ensure the long-term success of your prosthesis and to make any necessary adjustments or replacements.
Contact Grace Prosthetic Fabrication for Prosthetic Fabrication
The process of prosthetic fabrication is a detailed and personalized journey that requires close collaboration between the patient and the prosthetist. At Grace Prosthetic Fabrication, we are committed to crafting prostheses that are not only functional and comfortable but also tailored to each patient’s unique needs and lifestyle. With our expert care, you can trust that your prosthesis will be designed and fabricated to provide the highest level of support, mobility, and confidence.
If you or a loved one is in need of prosthetic fabrication, contact Grace Prosthetic Fabrication today to learn more about how we can help you achieve optimal outcomes through customized, high-quality prosthetics.


